| ∗ | | ISSUE THREE | | This issue is about the part nobody sees. Every photo I share has been through the same chain of decisions, and this time I'm walking one frame through it, from the file the camera gave me to the image you'd hang on a wall. |
|
| BEHIND THE EDIT | One lynx, five stages: how a RAW file becomes the photo you see |
|
|
1/4000 SHUTTER | f/8 APERTURE | 12800 ISO |
|
| THE EDIT AT A GLANCE | Five frames, four moves |
|
01 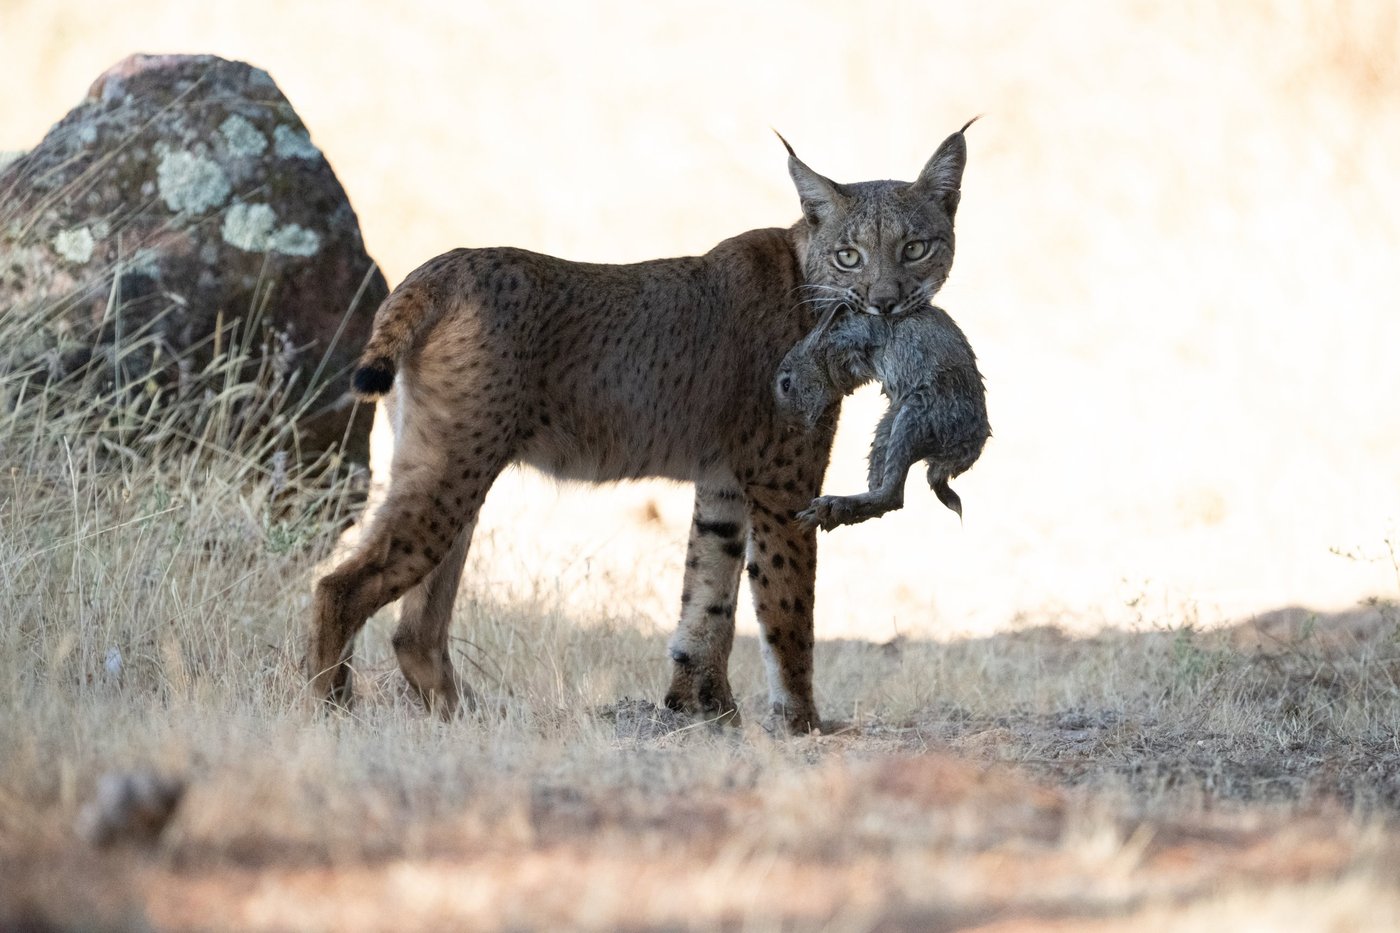 Straight from camera | 02 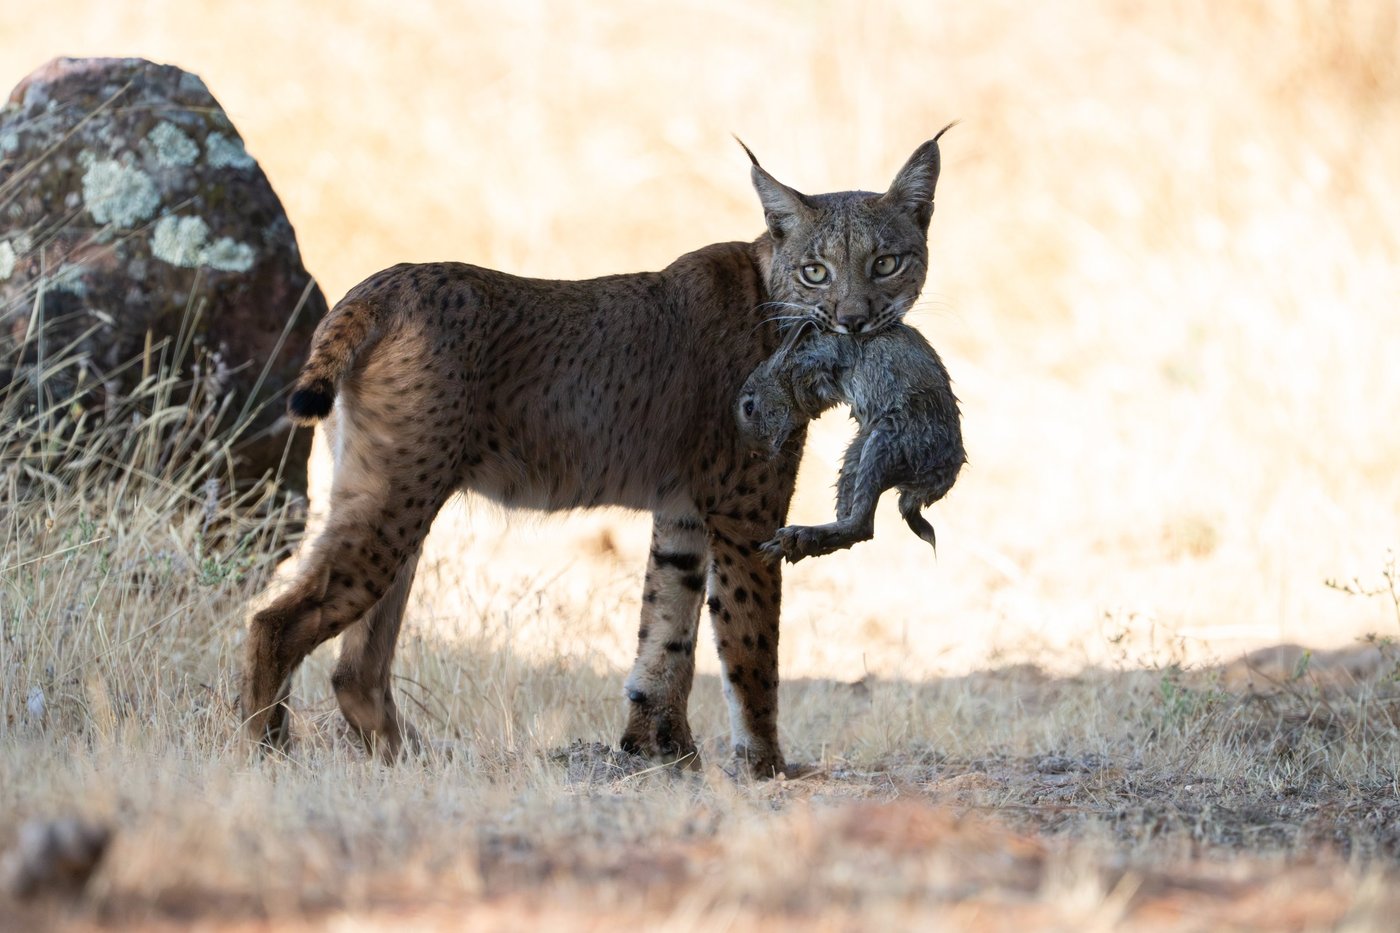 Background recovered | 03 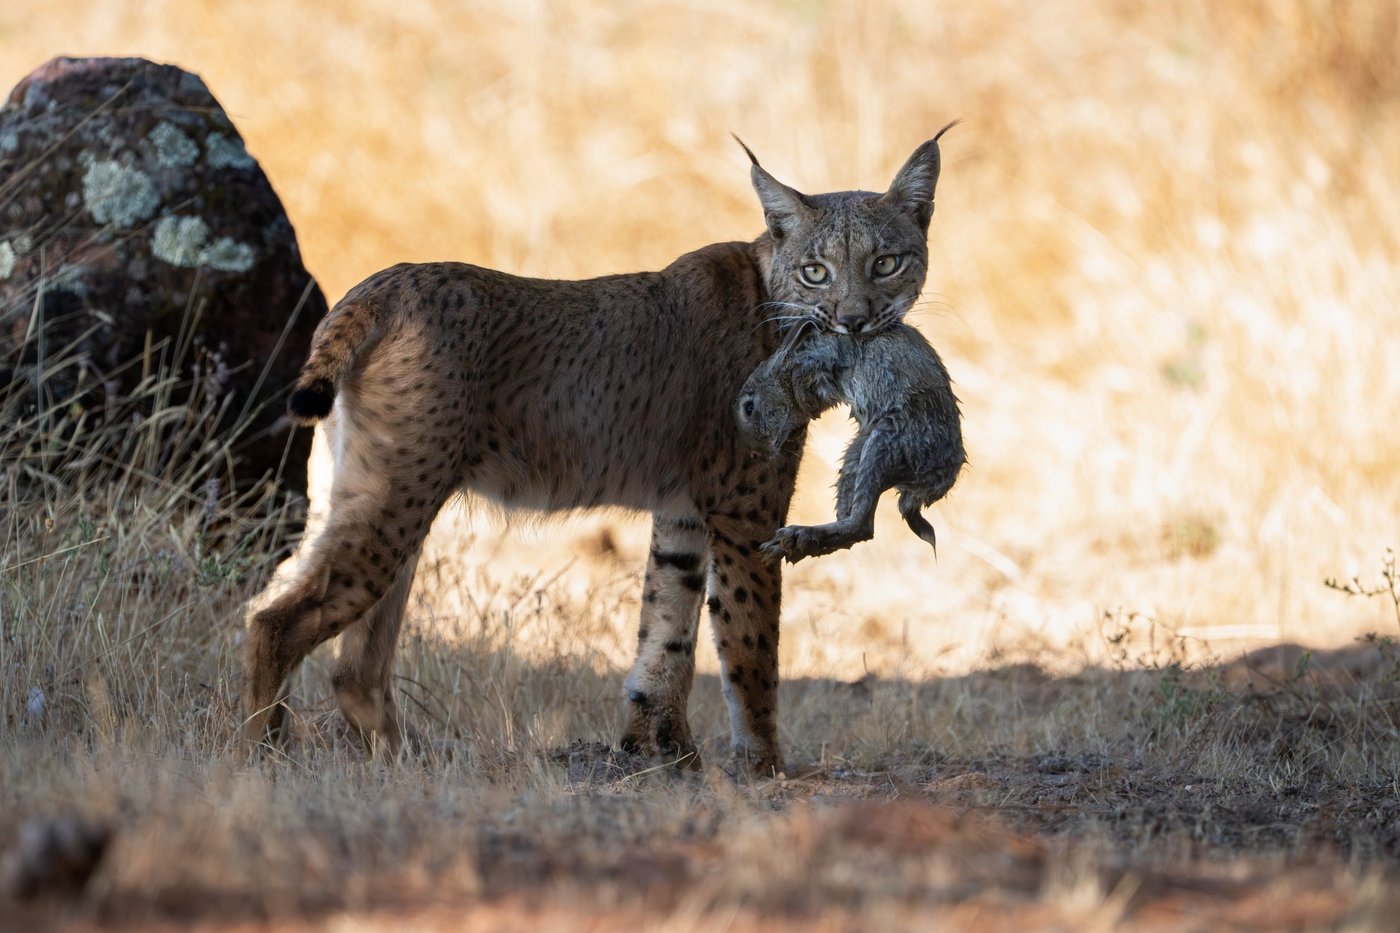 Basic corrections | | | 04 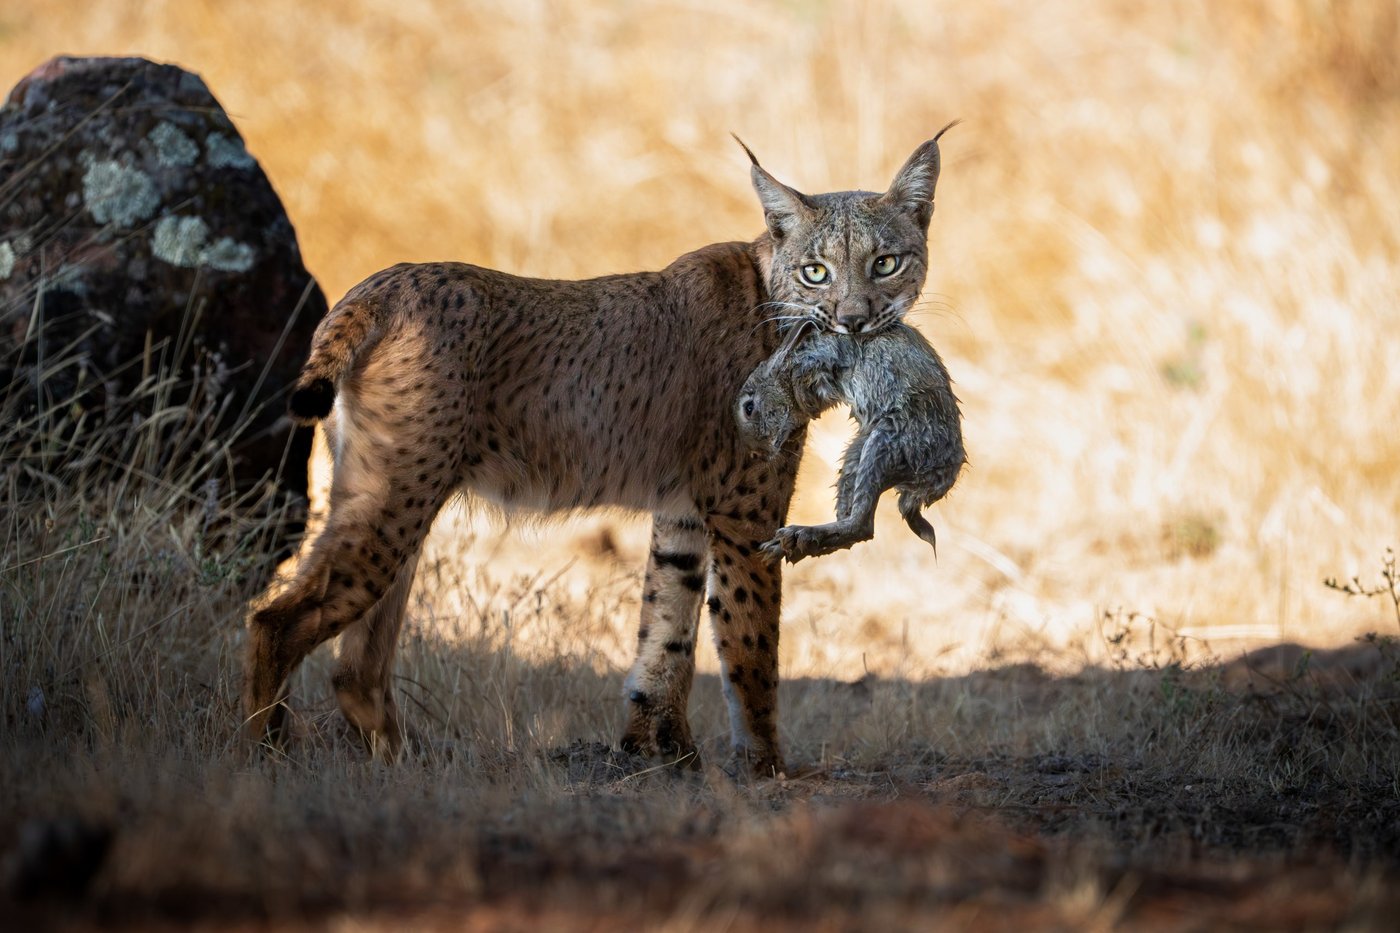 Guiding the eye | 05 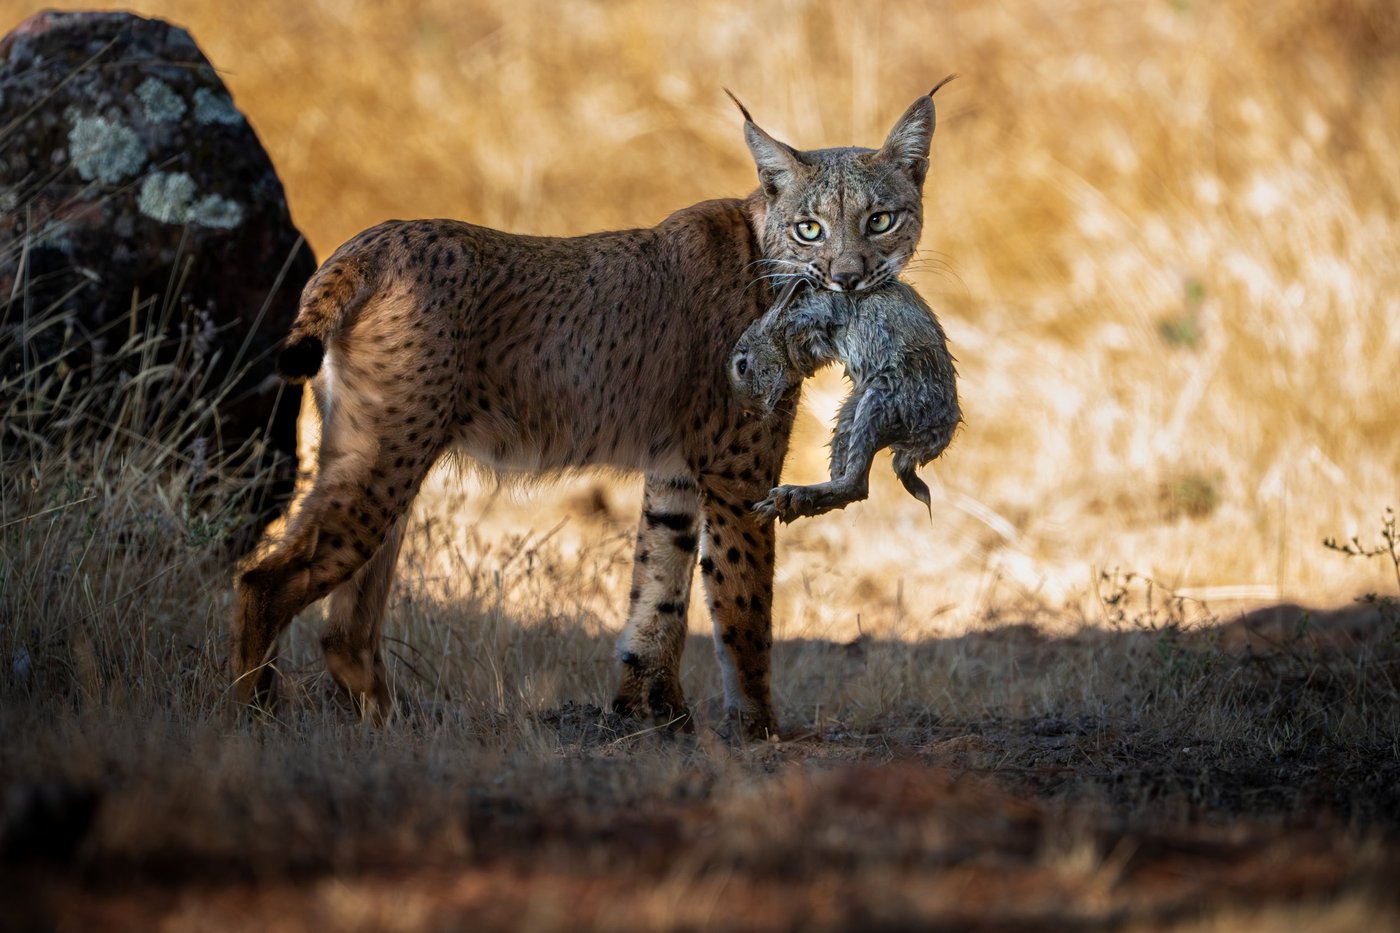 The finished photo | THE CHAIN Fix. Style. Guide. Finish. |
|
|
|
|
| THE STARTING POINT | The cat is exposed. The background is gone. | | The action was too fast for me to dial in exposure as carefully as I would have liked, and the camera was on average metering. The lynx came out well exposed. The background didn't: it's blown out. | | That decides what I do first. I can't judge the picture as a whole while half of it is a white wall. |
|
STRAIGHT FROM THE CAMERA · 1/4000 · F/8 · ISO 12800 |
|
| 01 | STEP 1 OF 4 Fix the background first |
| | Everything else waits until the grass has color and texture again. Red in the screenshots is what each mask touches. |
|
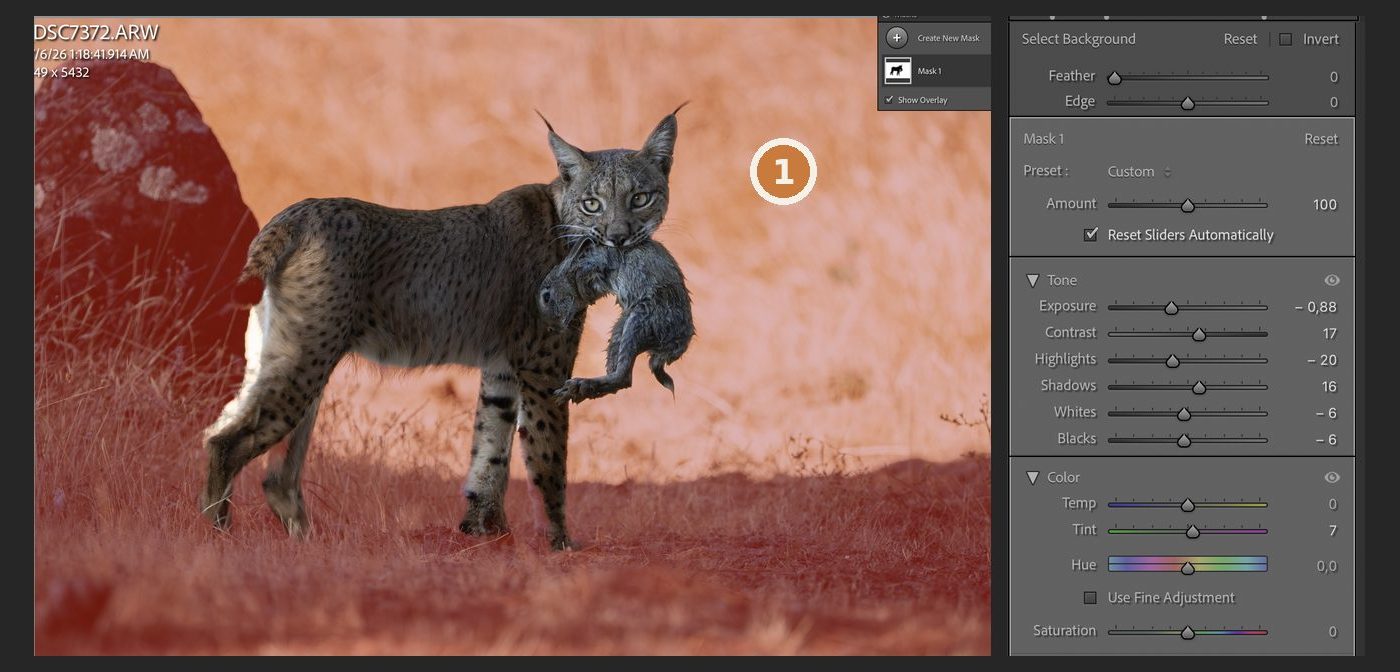 MASK 1 · SELECT BACKGROUND |
| Select Background. Exposure and highlights come down until the grass is golden again. |
| | MASK 1 SETTINGS | | Exposure | | -0.88 | | Highlights | | -20 | | Contrast | | +17 | | Shadows | | +16 |
|
|
|
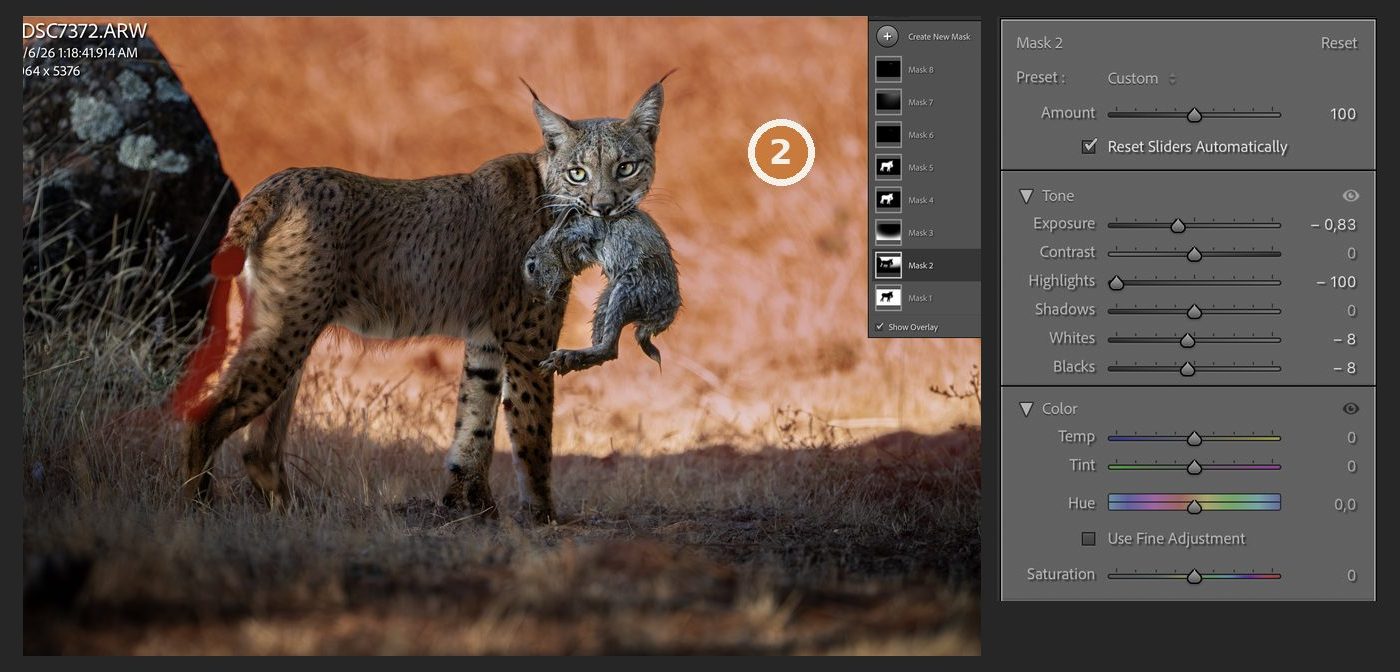 MASK 2 · BACKGROUND AGAIN, ROCK LEFT OUT |
| A second pass. Another background mask that goes further on the highlights and keeps the rock out, with a small brush on the tail. |
| | MASK 2 SETTINGS | | Exposure | | -0.83 | | Highlights | | -100 |
|
|
|
THE RESULT |
|
| 02 | STEP 2 OF 4 Basic corrections, to bring in my style |
| | With the background back I can look at the whole frame. Contrast a bit higher, highlights down, whites and blacks pushed apart, a little clarity and dehaze. |
|
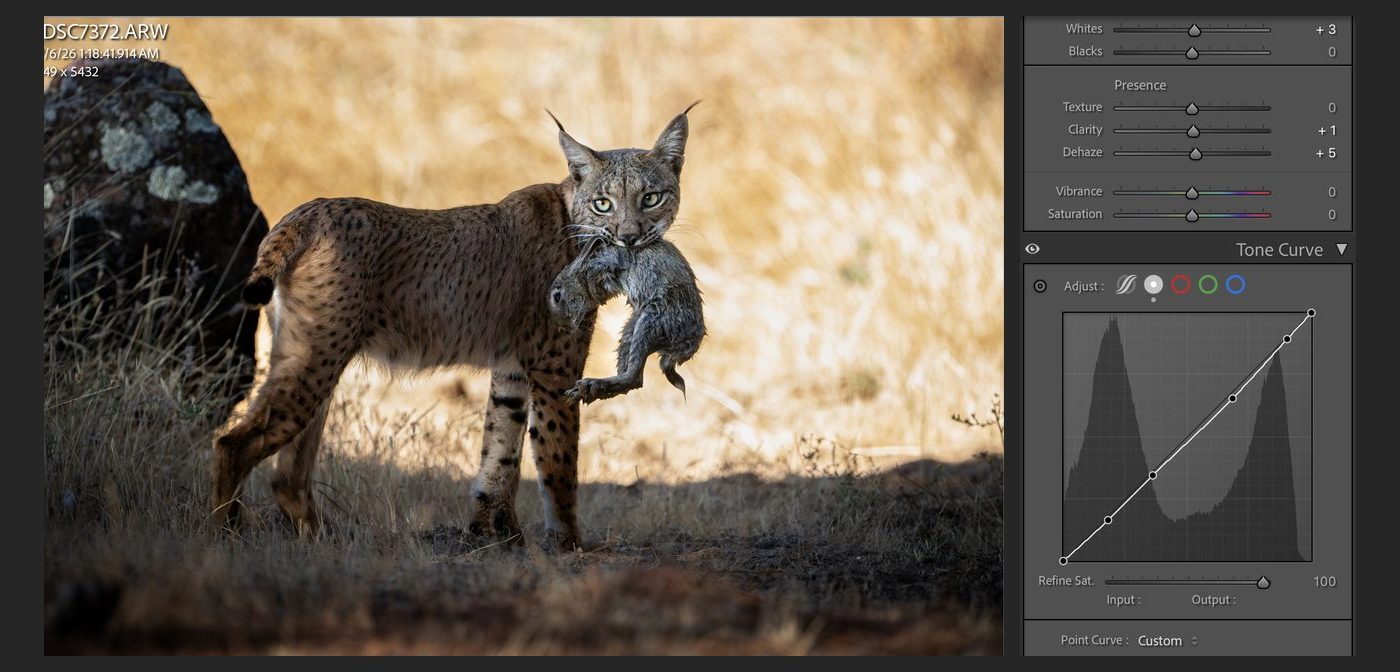 BASIC PANEL · PRESENCE AND TONE CURVE |
| BASIC PANEL SETTINGS | | Temp | | 5025K | | Tint | | +12 | | Contrast | | +22 | | Highlights | | -100 | | Shadows | | -11 |
|
|
|
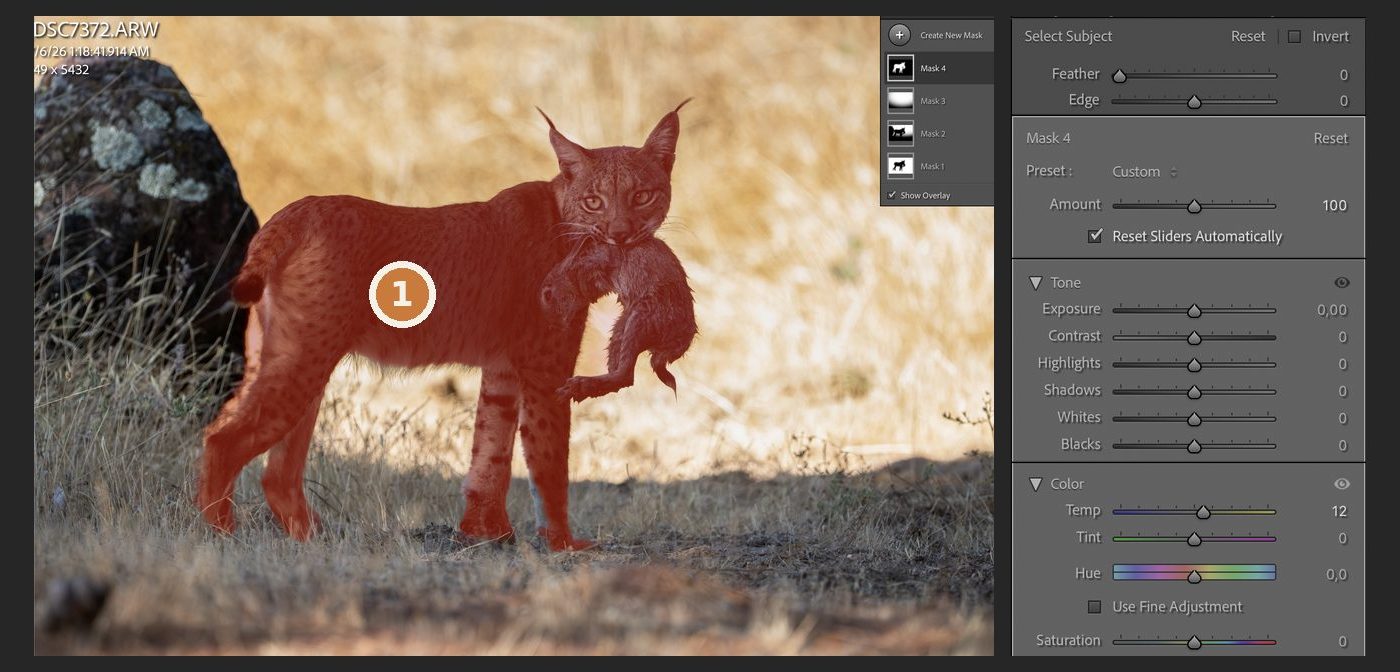 MASK 4 · SELECT SUBJECT |
| The lynx. It and the background looked lit by different lights, so the cat gets its own warmth mask: Temp +12. |
|
|
THE RESULT |
|
| 03 | STEP 3 OF 4 Guide the eye with light |
| | This is where most of the work happens. Soft radial filters and small changes in light lead the viewer to the face and the rabbit without telling them where to look. |
|
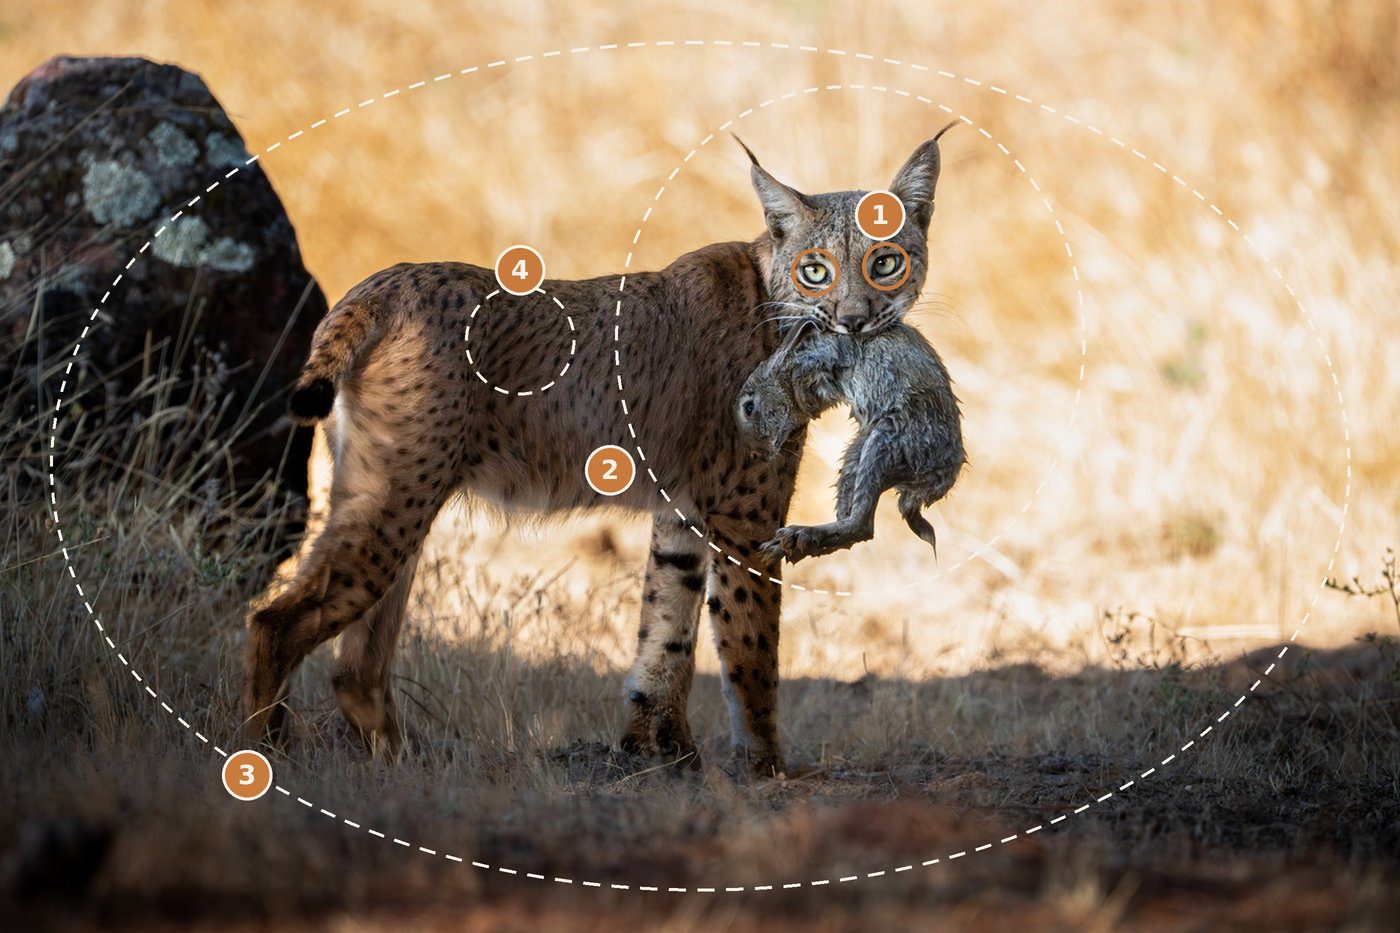 FOUR MASKS, ALL SOFT · DASHED LINES ARE RADIAL FILTERS |
| The eyes. A lift in color and dehaze so they pop, plus a tiny brush on the forehead to pull the tint back. | | The face and the rabbit. A radial with gentle contrast and light that pulls the eye in. | | The edges. A wide radial darkens the frame around the cat. | | The fur. More dehaze for the fur's own color, and soft gradients to clear the blue and aqua glare. |
|
|
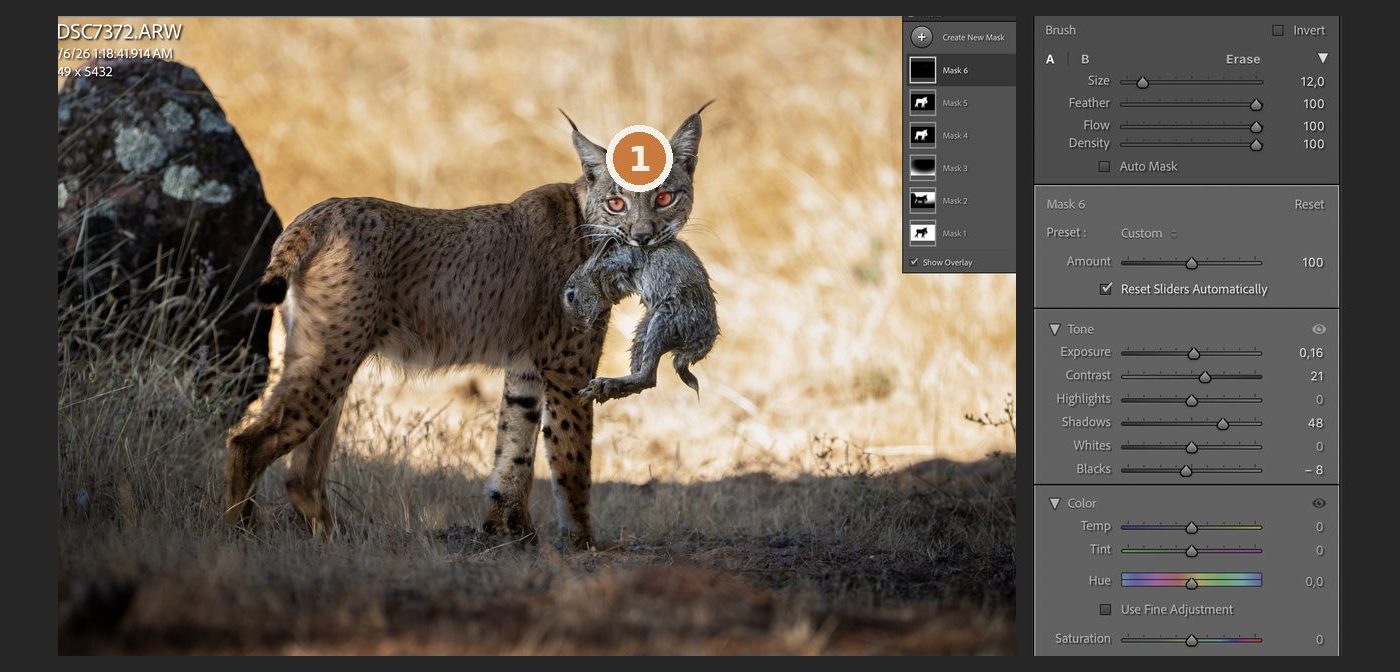 1 · MASK 6 · EYE BRUSH |
| MASK 6 SETTINGS | | Exposure | | +0.16 | | Contrast | | +21 | | Shadows | | +48 | | Dehaze | | +42 |
|
|
|
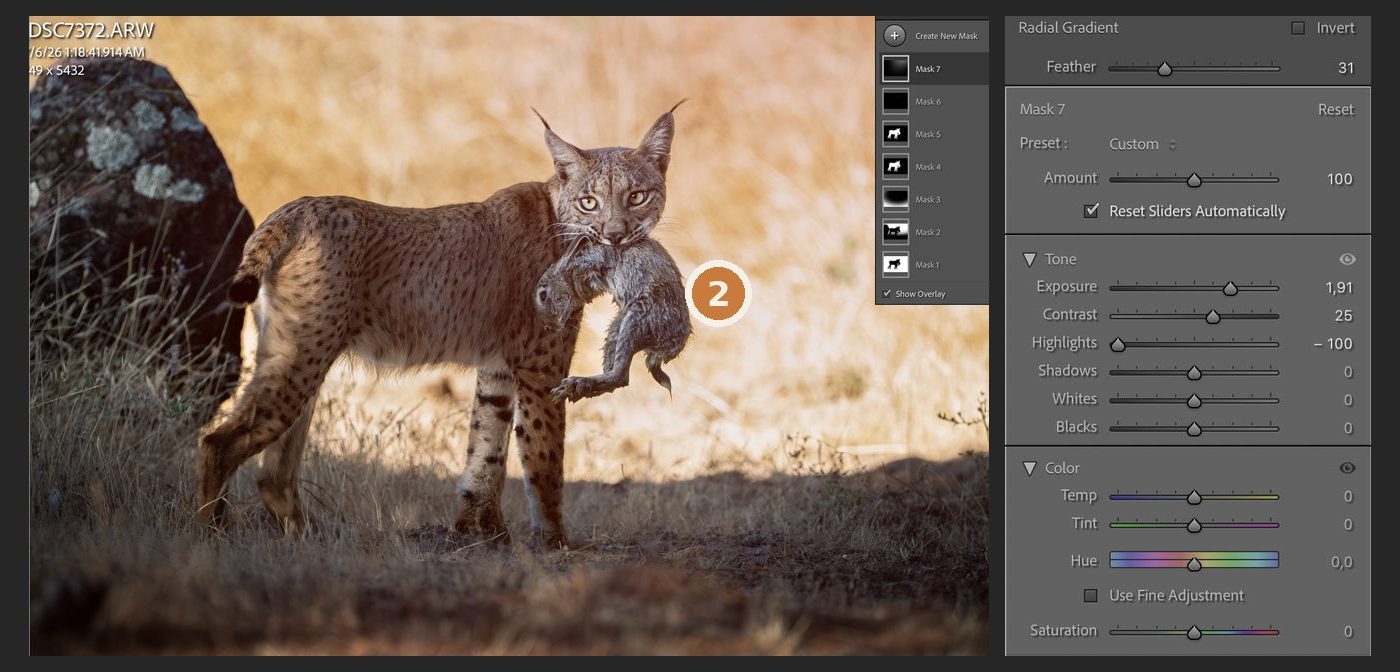 2 · MASK 7 · LARGE SOFT RADIAL ON THE FACE AND THE RABBIT |
| MASK 7 SETTINGS | | Exposure | | +1.91 | | Contrast | | +25 | | Highlights | | -100 |
|
|
|
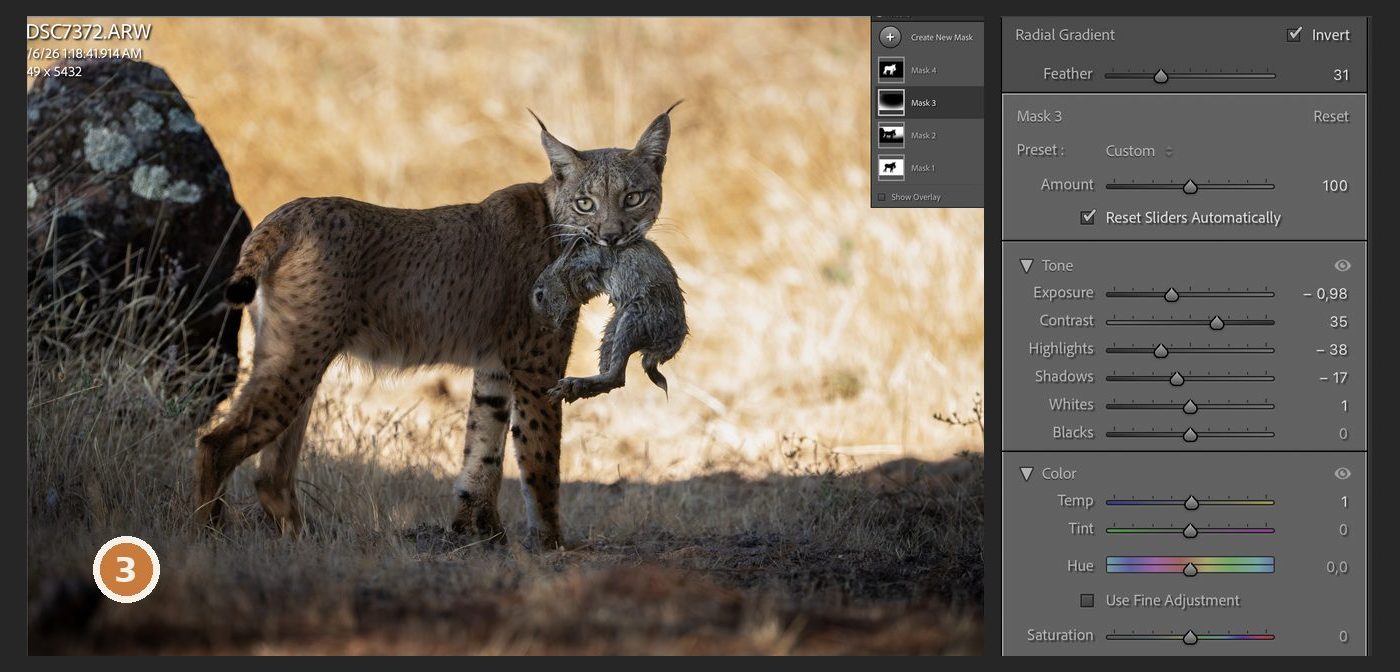 3 · MASK 3 · INVERTED RADIAL |
| MASK 3 SETTINGS | | Exposure | | -0.98 | | Contrast | | +35 |
|
|
|
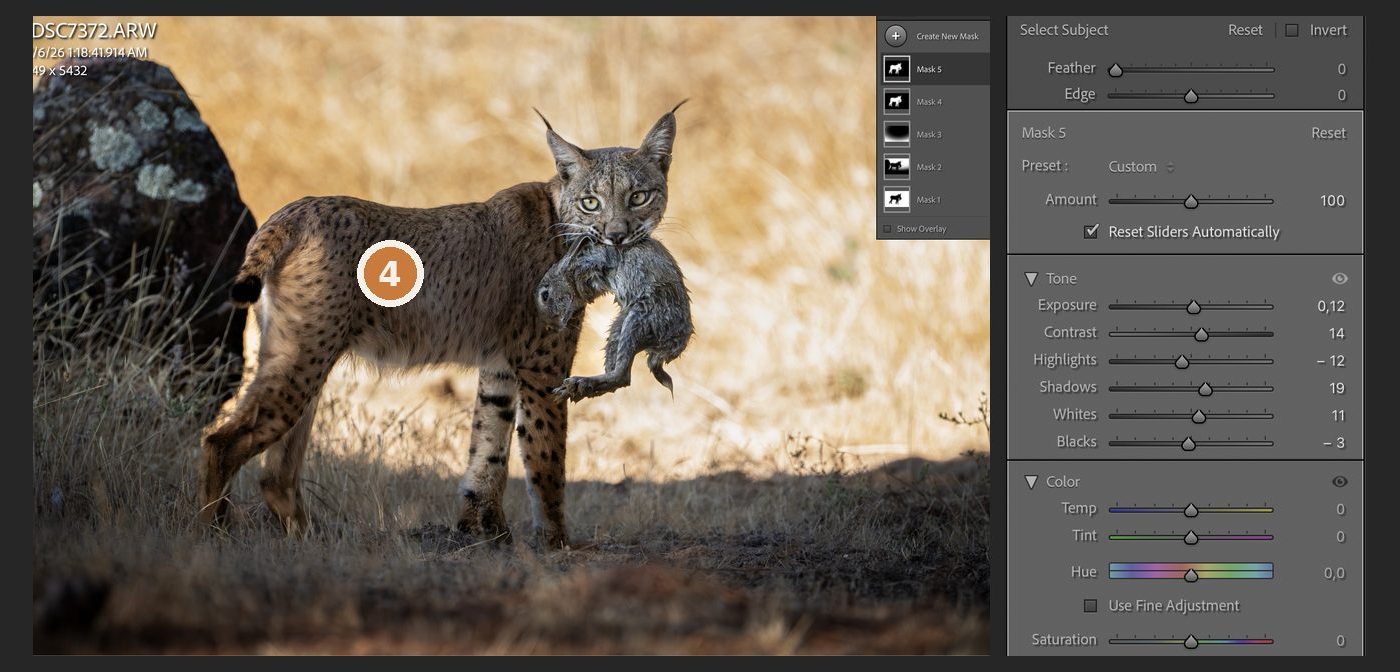 4 · MASK 5 · SELECT SUBJECT, FOR THE FUR |
| MASK 5 SETTINGS | | Exposure | | +0.12 | | Contrast | | +14 | | Highlights | | -12 | | Shadows | | +19 |
|
|
|
|
| 04 | STEP 4 OF 4 Tighter crop, more shadow, one last color pass |
| | A tighter crop keeps the attention on the cat. Then the shadows go down to -11 for more contrast, and one more round of color to get the image ready. |
|
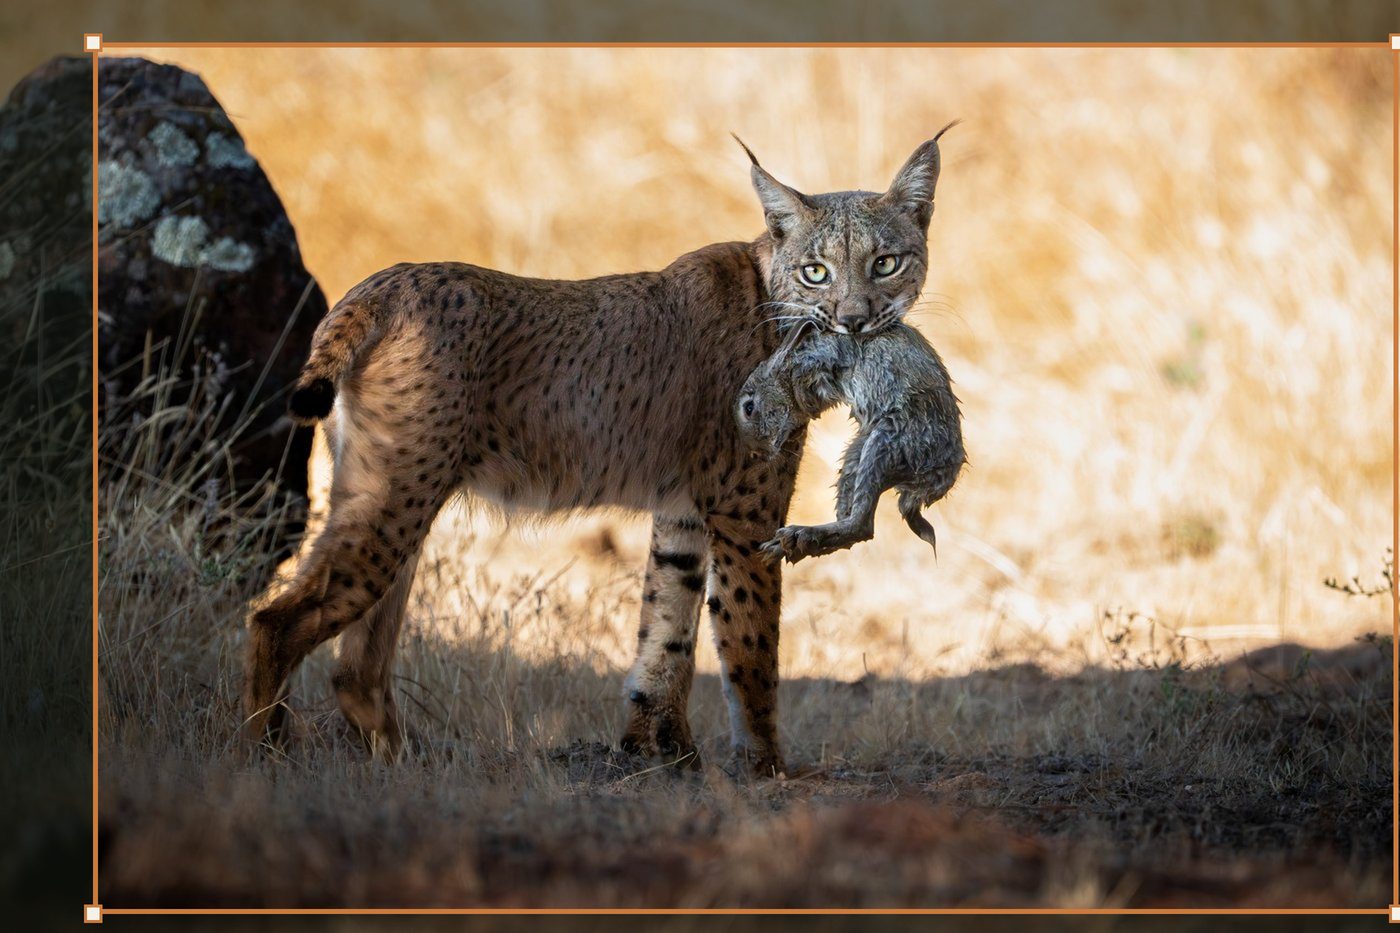 THE CROP · 6.7% OFF THE LEFT, 4.6% OFF THE TOP, 2.1% OFF THE BOTTOM |
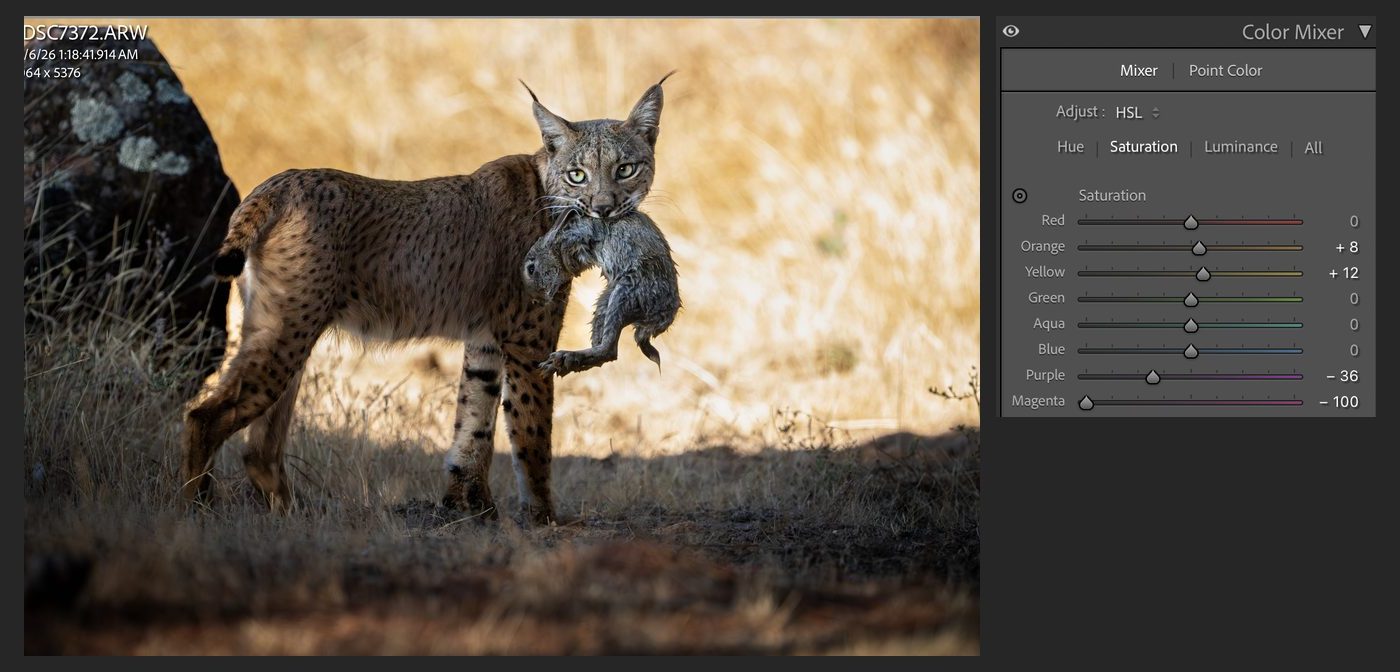 COLOR MIXER · SATURATION |
| COLOR MIXER SETTINGS | | Orange | | +8 | | Yellow | | +12 | | Purple | | -36 | | Magenta | | -100 |
|
|
|
THE FINISHED PHOTO |
| That's the whole chain on one frame. Fix what's broken, bring in your style, guide the eye, then finish. The order is what keeps each step from fighting the one before it. | Questions about any step? Send me a message on WhatsApp.
Lior |
|
| QUESTIONS | Editing wildlife photos in Lightroom: your questions | What software do you use to edit your wildlife photos? | | Lightroom. Everything in this edit is done with its masks (Select Background, Select Subject, a brush and radial gradients), plus the basic panel, the tone curve and the color mixer. | How do you fix a blown-out background in a wildlife photo? | | Mask the background on its own and bring exposure and highlights down until the texture comes back. On this lynx it took two background masks, the second one leaving the rock out. | What settings was the lynx photo shot at? | | 1/4000s, f/8 and ISO 12800, on average metering. The action was too fast to fine-tune exposure, which is why the background blew out. | In what order should you edit a wildlife photo? | | Fix what's broken, bring in your style, guide the eye with light, then finish with the crop and color. That order keeps each step from fighting the one before it. | How do you make the eyes stand out in a wildlife photo? | | A small brush on the eyes with a lift in shadows, contrast and dehaze. On this frame: Exposure +0.16, Contrast +21, Shadows +48, Dehaze +42. |
|
| NEXT IN THE FIELD JOURNAL | Photographing the morphs of Oophaga pumilio in Bocas del Toro | | Same frog, a different color from one island to the next. Next issue: how I find them and how I photograph them. See the Bocas del Toro poison frog tour. | 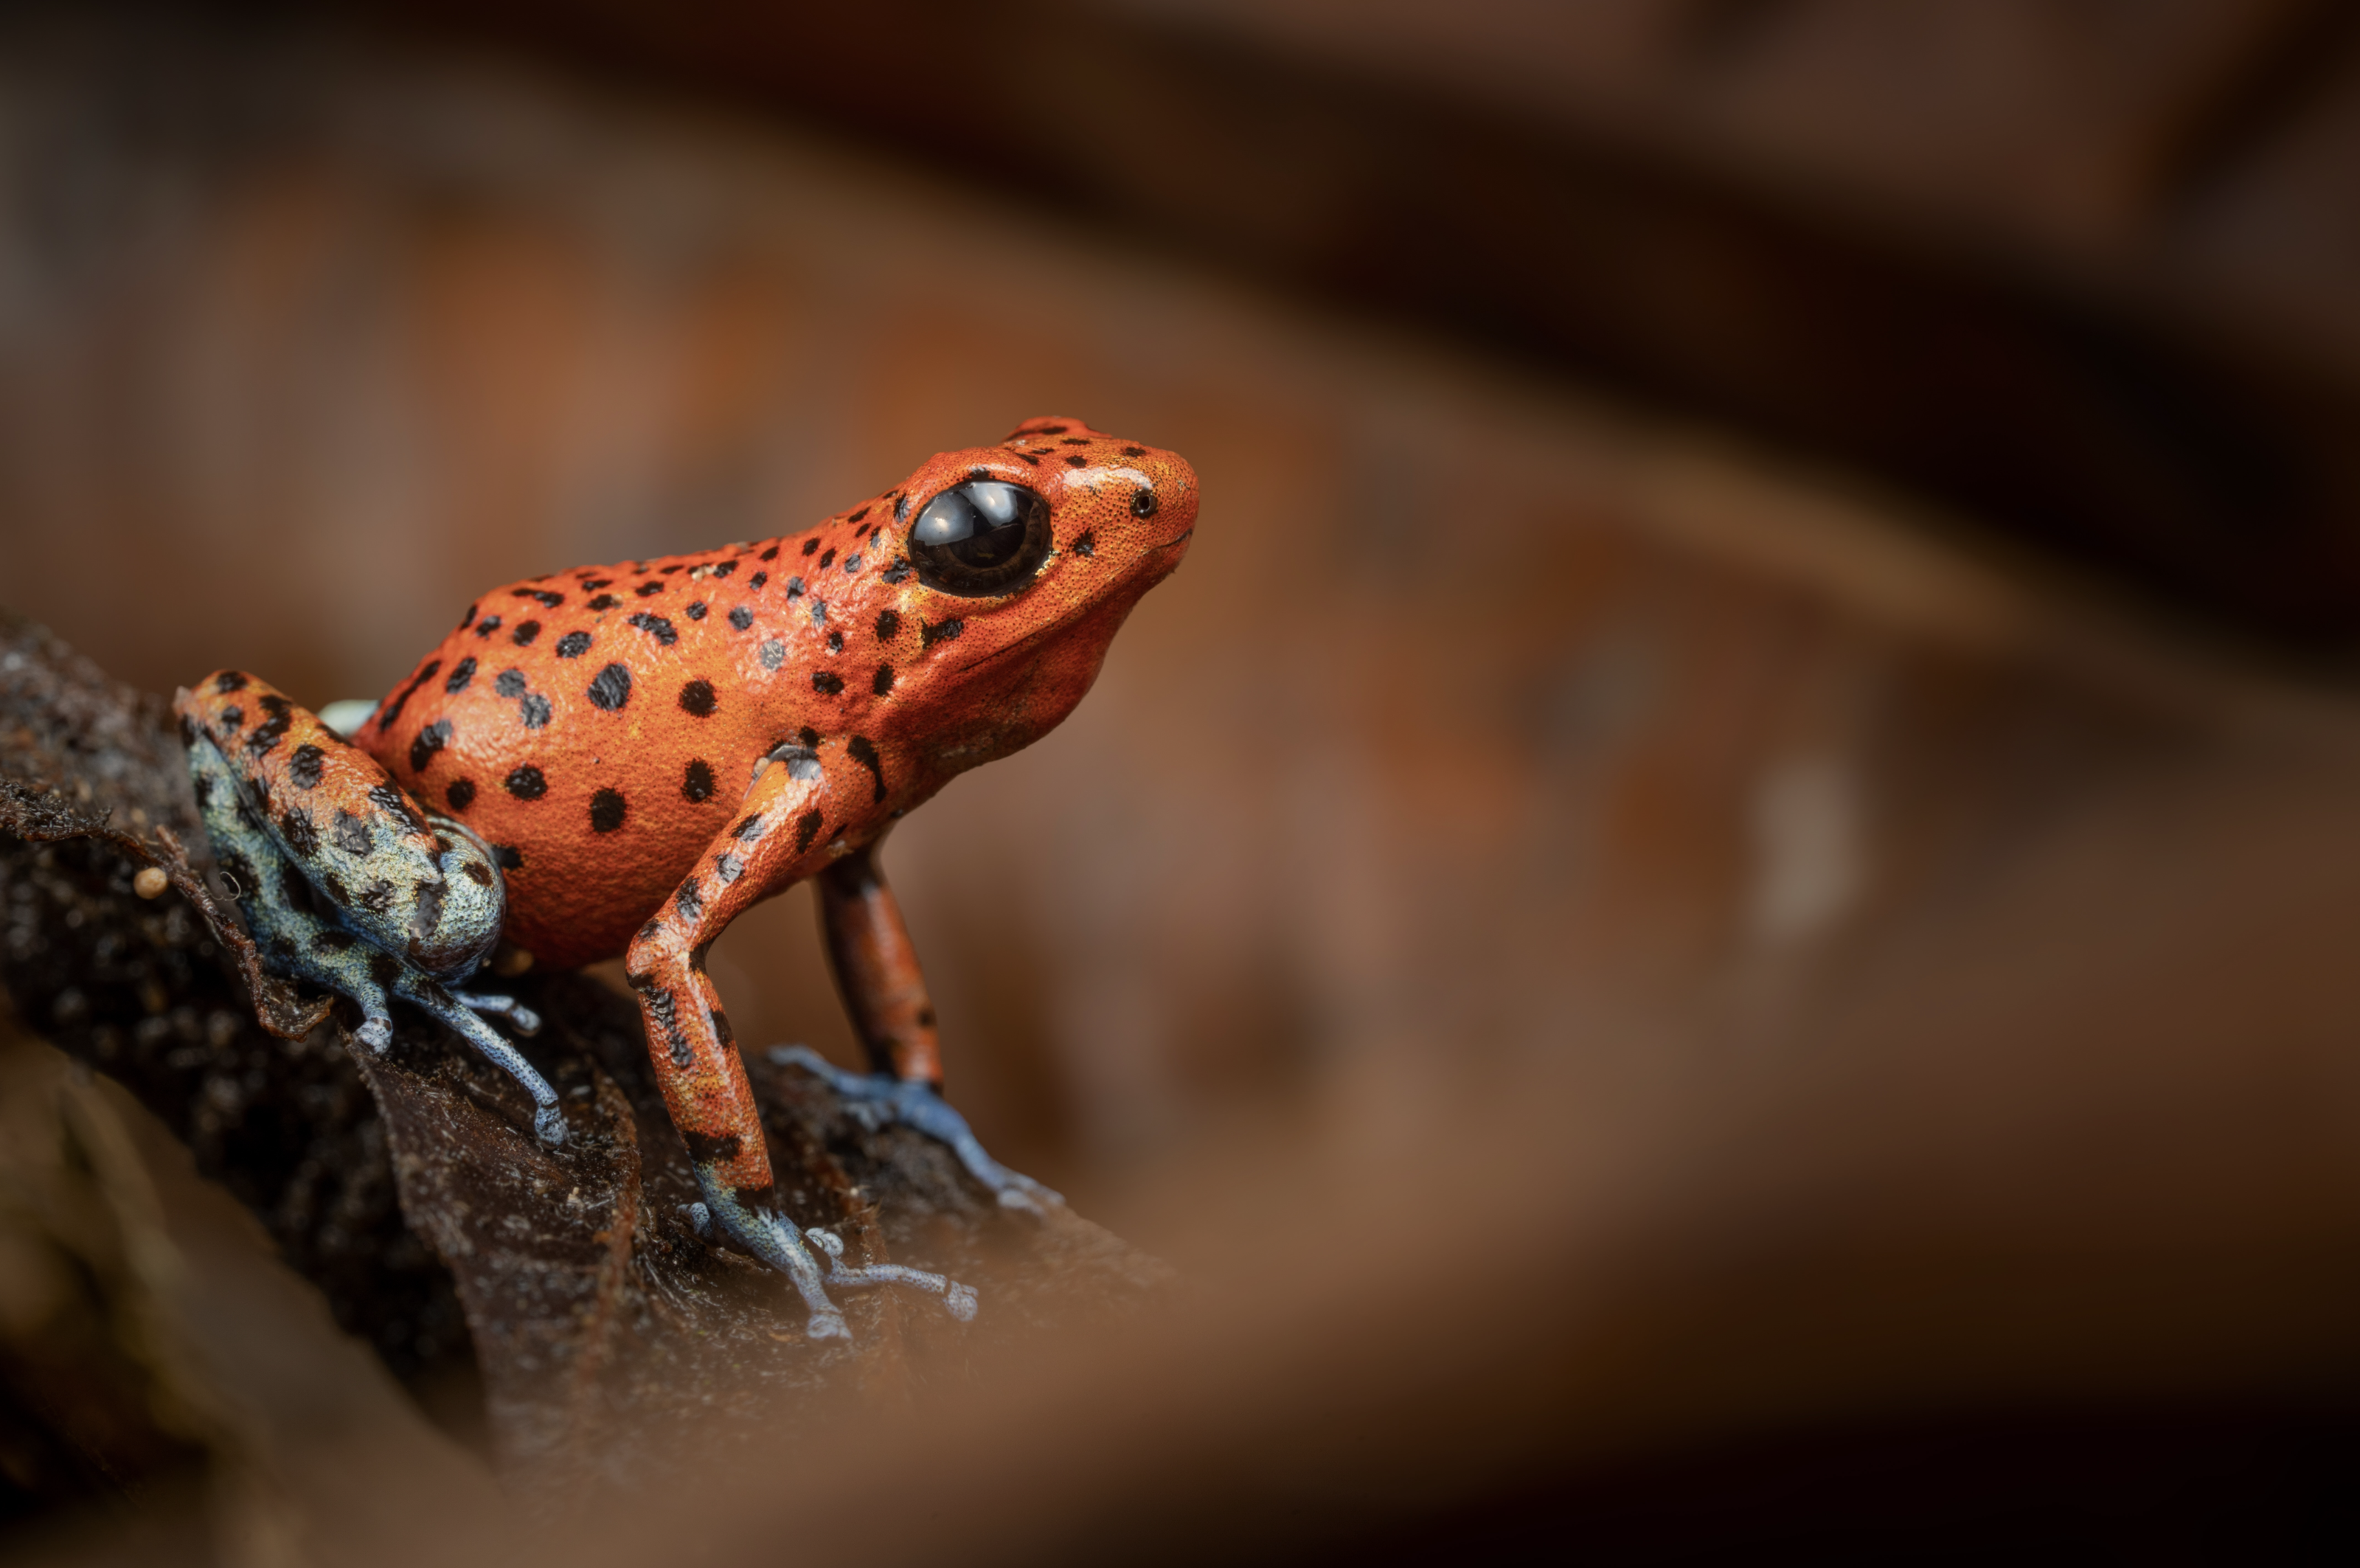 |
|

